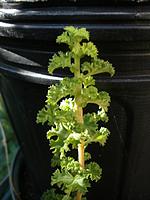
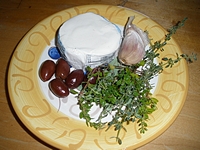
Tame Overgrown Herb Patches As You Stock Your Pantry With A Winter Supply Of Dried Herbs

October 16th, 2013

Yes, with minimal effort, you can stock your pantry with dried herbs as you weed your herb garden throughout the season.

Every year I seem to go through the same pattern.

In the early summer, I have ever-expanding perennial herb patches, and new volunteer herb plants popping up all over the place.  After using some of these herbs fresh, and giving some away, I pull out and compost the most unruly patches.  Mostly, I just give up and let the herb plants grow wild wherever they want.

Then, in late summer and fall, I am frantically trying to dry as many varieties of herbs as I can. Most of the herbs I gather are well past their prime at this point.  And my house is filled with drying herbs everywhere!  So much for harvesting and drying herbs at the peak of their flavour and sweetness.

This pattern repeats itself in my household every year.  It’s madness, really.

And why?

Early summer in southern Ontario is full of the madness of spring fever!  The intoxicating smells of new growth permeate the air.  It’s all about enjoying the moment, the newness and lushness of all this green growth.  It’s a time of multiple visits to the garden centres, resulting in seduction and over-buying of many flower, herb, and vegetable plants that must be planted somewhere at some point over the next few days or weeks.

There is absolutely no thought given to preserving any of the over-abundance of volunteer herbs at this time.  Harvesting and preserving herbs for the winter is a romantic distant notion, reserved for the fall.

This past summer though, as I was pondering the demise of a vibrant patch of lemon balm that encroached another garden bed and that I had ignored last year, I felt the need to do something with it. I knew I had to pull the lemon balm out, or it would completely take over.  Disheartening to pull out such a healthy and vibrant herb patch of lemon balm, but it had to be done.

As I sat looking at the pile of lemon balm that I had torn out, I snipped a few choice branches to make lemon balm tea.  Normally, I would toss the remainder of the pulled herbs (often lemon balm, mint, and oregano) into the compost.  I had given up on saving them for later, because later never came and the herbs I saved would end up slimy in my fridge and composted anyway.

I figured I would go through the pile of lemon balm and clip some more choice branches anyway.

I brought the lemon balm sprigs into the house, rinsed them immediately (I knew I wouldn’t do it later), and lay them out to dry on a tray lined with parchment paper after shaking off the water and gently patting the leaves dry.  Whatever fit on one tray – nothing more.

The fresh young lemon balm dried beautifully, and I packed the dried leaves away for the winter.  I left the parchment lined tray out.

Throughout the summer, as I was weeding or picking herbs for use in the kitchen, I would harvest extra every now and then and lay it out to dry on that same parchment.

I wasn’t overly diligent.  But over the course of the summer weeks, I have accumulated a nice stash of dried herbs for the winter.

If you prefer to freeze your herbs, freezing in small batches throughout the summer works just as well.

Now that it’s autumn, my house is not filled with an unmanageable array of drying herbs all over the house – my family is thrilled.  And, I’m enjoying seeing my little stash of dried herbs tucked away in paper bags, waiting to be pulled out on a cold winter’s day.

Drying herbs in small batches throughout the summer was so much easier than the big-batch drying I had done in previous years.  And the quality of the dried herbs is better.
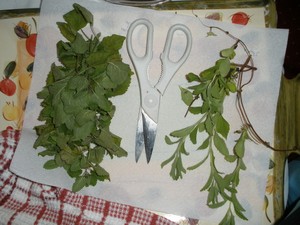
If you’ve never dried herbs before because the tasks seems too daunting, or your family members are fed up with trays of drying herbs everywhere, give small-batch drying a try.

And that patch of herbs that needs to be tamed?  Well, why not dry some of those herb clippings for winter use.

To your herb gardening success,
Barb

Copyright © 2013 www.HerbGardenGal.com.  All rights reserved.
Bringing My Herb Garden Indoors

November 19th, 2012

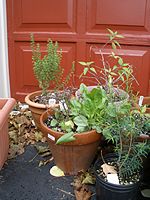
Potted Herbs Indoors

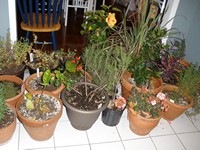
It’s been a hectic year, and many of my potted herbs from the herb garden have been left outside way past the time that they should have been brought indoors.  Alas, what else is new.

I usually start bringing my herbs indoors systematically, starting with those that do not tolerate cold, followed by my herbs that can tolerate some cooler temperatures. 

This year, not so.

The weather had been nice, although the evenings had started getting colder.   I was praying that the weather would hold up until after our Canadian Thanksgiving (October 8th).  I was hosting this year’s dinner, and didn’t know what I would do with all my plants, should frost hit before then.

Wouldn’t you know, the night time temperatures dropped drastically during the week before Thanksgiving.  We did not have frost, but my lemongrass, scented geraniums, and a few other warmth loving herb plants were showing signs of being stressed a little too much. 

The vibrant overgrown Lemongrass leaves were turning brown quickly, and my Gotu Kola herb that was spreading really nicely suddenly lost its vitality. 

On Thanksgiving, everyone came and enjoyed the feast, as my herb collection remained outdoors.  The weather warmed up the following week. 

By the end of that week, the temperature was dropping again, and there was a frost warning issued.  All my precious tender perennials had to be brought indoors quickly

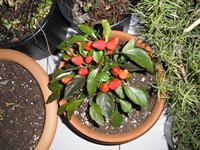
Aurora Hot Pepper

 – my potted herbs, geraniums that I wanted to overwinter, and an Aurora Hot Pepper plant filled with colourful peppers.      

There was no acclimatizing the plants to the indoors.  It was come indoors or die.  So I hauled them all in one evening.  Yes, all 36 pots were brought in at once.   

And once they were in, they were in.  There were just too many plants to take outdoors for the day, then bring them back in for the night. 

Some of the herb plants are looking a little stressed, and others haven’t changed the way they look at all.  Yet, that is.  For this is just the beginning of their winter stay indoors. 

I will need to keep a close eye on all the herb plants for bug infestations throughout the winter.  Indoor dry conditions and lack of natural predators is a haven for aphids and spider mites.

My first order of business has been to find saucers to put under all the pots, so I can water them. 

I remove the saucers from under the pots when I take the plants outdoors.  Outdoors, I find all too often the plants will sit in water too long, especially during extended periods of rain, or from an overzealous family member watering plants whose soil is already wet. 

Most herb plant roots do not like to sit in water, and will start to rot. 

Standing water is also a breeding ground for mosquitoes, and I certainly did not need more of those in my backyard!

When I brought my herb plants in, they were all brought in together, and piled into an out-of-the-way area until I was ready for them.

Now all the herbs need to be moved to their winter homes by the windows. 

To help protect and keep the surfaces in my house clean, I lay two padded plastic picnic tablecloths down on the table or floor. 

These tablecloths prevent water and moisture from the plant pots from  ruining the surface beneath.  In the spring when the plants go out, I pick up the tablecloths and the floor underneath is clean.

I pick up the tablecloths at the dollar store.  Sometimes pots or their saucers have rough edges, which may poke a small hole into the plastic of the tablecloth.  For this reason, I double them up.   If there is a small tear in the top tablecloth, the surface is still protected by the bottom tablecloth. 

I found this system has worked beautifully for me for years.  And, the tablecloths are reusable the following year, if they are not damaged.  It’s very economical.

Now that my herb plants have somewhat settled in to their new home indoors, it’s time to turn my attention to some last-minute harvesting.  Horseradish root and fennel seeds, here I come!

To your herb gardening success,
Barb

Copyright © 2012 www.HerbGardenGal.com.  All rights reserved.
Lemon Scented Herbs in a Kitchen Herb Garden

December 7th, 2011


Culinary herbs are fascinating plants.  They have such a wide range of fragrances  and flavors.  And what I find most fascinating is the number of herb plants that have lemon and other citrus scents.

Some lemon scented herbs have a hint of lemon amidst other scents, while others give off a distinctly lemon scent when crushed or brushed by.

These lemon herbs are wonderful herbs to grow in the herb garden, for their scent alone.  But what makes them extraordinary is the wonderful flavours these lemon scented herbs lend in the kitchen.

Lemon herbs add such a range of interesting and delicious flavours to meats, fish, salads, fruit, teas and cold drinks.  Lemon scented herbs are especially popular used in herbal teas, and potpourris.

Here’s an offering of 9 lemon scented herbs to experiment with in the kitchen, and tantalize your tastebuds.

1.  Lemon Balm (Melissa officinalis)

Lemon Balm is a popular lemon scented herb that is an easy-to-grow perennial plant in most climates.  Bright fresh lemon scent is released when the leaves of lemon balm are rubbed together.

The leaves of lemon balm are most lemony in the spring.  As the summer progresses, the leaves of lemon balm tend to develop sharper notes.

Herb tea made from dried lemon balm leaves is delightful.  Throughout the summer, I prefer tea made from fresh lemon balm leaves.

Mix chamomile and lemon balm for a soothing, relaxing tea.

Iced tea made with lemon balm is also delicious, and a nice substitute if you don’t have fresh lemons handy.

Add chopped fresh lemon balm leaves to salads, and to fruit salads, for a hint of lemon flavor.

2.  Lemon Basil  (Ocimim americanum)

Lemon Basil is a great lemon herb to grow. The lemon basil herb is a tender annual herb that can be started from seed, or purchased at your local nursery.

The combination of basil with lemon is superb served with chicken or fish.  Like other basils, lemon basil is best added last minute to your cooked dishes, or sprinkled on top.

Swap in lemon basil for regular basil in your pesto, for a wonderful fresh slightly lemony touch to an old classic.

Lemon basil leaves also add a great flavor punch to any salad, or light salad dressing.

3.  Lemon Bergamot  (Monarda citriodora)

Lemon bergamot herb is an annual herb, also grown as an ornamental.  Enjoy the showy purple-pink flowers in your garden, and the lemony leaves in your kitchen.

Native to the American southwest, Lemon Bergamot was used by native Indians to flavor wild game, and as a tea.

Young leaves of lemon bergamot have a strong lemon scent that makes an excellent tea.

4.  Lemon Scented Geraniums (Pelargonium)

Scented geraniums are a scented herb plant, popularly grown in England.  And there are quite a few  scented geraniums with lemon scents.

Fingerbowl Lemon Geranium

Lemon scented geraniums, when used in cooking, are added to sweets.  They are a nice addition to jams, jellies, candied for a confectionary decoration, or added to fruit punches.

Fingerbowl lemon geranium grows tiny lemon scented leaves , that were added to fingerbowls during Victorian times.  This is my favorite lemon scented geranium.

The leaves of Fingerbowl Lemon Geranium are so pretty and fragrant added to a fingerbowl.  Add a fun and elegant spin to a meal with messy finger food, or for a more elegant dinner party.

Finely chop the leaves of this dainty lemon scented geranium, and add to lemonade or fruit salads.

Other outstanding lemon scented geraniums that are suitable for culinary use are Frensham lemon, and Mabel Grey.

5.  Lemongrass  (Cymbopogon  citrates )

Lemongrass is a tender perennial lemon scented grass, hardy only in zones 11 and above.

Grow the lemongrass herb in a pot, and bring it indoors for the winter.  Lemongrass will usually overwinter successfully indoors.

The tender base of lemongrass leaves is prevalent in Thai and Vietnamese cooking.

Use lemongrass leaves to flavor soups, curries, fish and chicken.

Lemongrass leaves can also be used to make tea.

If you’re looking for a variation on chicken soup, toss in some lemongrass and ginger.  And enjoy the  warm lemony twist to your chicken soup.  Simple, yet exotic.

6.  Lemon Gem Marigold (Tagetes tenuifolia)

Lemon Gem marigold is a pretty and compact marigold with bright yellow flowers, and a citrusy scent and flavor.

This marigold also comes in variations with orange flowers (Orange Gem Marigold), and red flowers (Red Gem Marigold).  Grow these pretty annuals as a border plant in your garden.

All three of these ‘Gem’ marigolds offer up the same pleasant citrusy scent.  I find the flavor of these ‘Gem’ marigolds mild and pleasant.

Brighten up your salads with these delicate little yellow, orange, or red flowers.  The Gem marigolds also make outstanding edible garnishes.

7.  Lemon Mint (varieties of Mentha with a lemon scent)

Citrus scents are common in a number of mints.  There are mints with lemon, lime, orange and grapefruit scents.

The term ‘lemon mint’ can be confusing, as I often see bergamot mint and lemon balm also referred to as lemon mint.  And bergamot mint is also referred to as orange mint.

An interesting lemon mint I’ve grown in my garden is Hillary’s Sweet Lemon Mint – and yes, this lemon mint was named after Hillary Clinton.

To purchase Hillary’s Sweet Lemon Mint, visit Richters Herbs  online — Richters holds propagation rights for this lemony Westerfield mint.

Use lemon and other citrus scented mints as you would other mints — in teas, drinks, add to salads and fruit desserts.

8.  Lemon Savory  (Micromeria biflora)

Lemon savory is a very tender perennial (hardy in zones 11 and above), with an Intense lemon scent and flavor.

Different from other savories, and  difficult to find, Lemon Savory is definitely worth a try if you find it.

Add lemon savory when cooking fish, or chicken, or any other savory dish that could use a lemony touch.

Lemon savory can also be used when making teas.

9.  Lemon Thyme (varieties of thymus with a lemon scent)

Lemon thyme scent and flavor is an aromatic combination of thyme and lemony citrus.

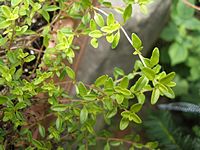
There are many varieties of thymes with lemon scents.  Green leaved varieties, golden leaved varieties, variegated varieties , all have that distinct lemon thyme scent.

Lemon thymes are as easy to grow as any other thymes.  They are beautiful compact herb plants that lend themselves to growing in pots, herb gardens, and garden borders.  Lemon thyme varieties exist in creeping ground cover growth, or low growing bush herbs.

Lemon thyme is a very versatile herb.  Add it to teas, any meat, chicken and fish dishes.  Also, add lemon thyme leaves to salads, and salad dressings.

My favourite use of lemon thyme is to make a simple bread stuffing for chicken, and add lemon thyme to the stuffing.  Delicious!

Lemon Verbena  (Aloysia triphylla)

Lemon verbena herb is a wonderful lemony herb, with very pleasing lemon scented leaves.  The leaves of lemon verbena have a strong lemon flavor.

This perennial shrub is usually grown in pots, and brought indoors for the winter.

Lemon verbena leaves are very versatile.   Add them to teas with other herbs.

Use lemon verbena in meat and fish dishes, and in soups and salads.

Lemon verbena is fabulous added to drinks, jellies, and lemony desserts – as lemon flavouring and garnish.

.

lemon grass

Lemongrass

Lemon Verbena

.

.

.

.

.

.

.

.

.

You will find some of these lemon scented herbs at your local garden center.

For harder to find lemon herbs, or to enjoy the convenience of online shopping, click here… to visit Richters Herbs.

If you like to experiment in the kitchen, lemon scented herbs offer up an opportunity to create many unique and delicious dishes.

To your herb gardening success,
Barb

Copyright © 2011 www.HerbGardenGal.com.  All rights reserved.

_________

Want to use this article in your Ezine or Website?  You can, as long as you include the complete article intact and the Copyright information.

Grow Garden Sage In Your Kitchen Herb Garden

November 3rd, 2011

Sage In The Herb Garden

What Is Garden Sage

Garden sage is the best known group of sages used today.  The dried sage you find in the supermarket is garden sage.

The grayish green leaves of garden sage are used as a culinary flavoring in many cuisines, and sage is the quintessential seasoning in Thanksgiving turkey stuffing.

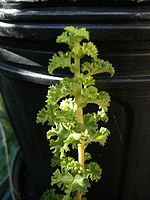
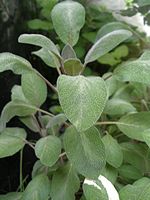
Easy to grow, garden sage is a standard herb in most kitchen pantries.  Garden sage is a hardy perennial plant with woody stems, and soft velvety leaves.

Garden sage blooms in June, and its flowers are also edible – generally lavender in colour, but depending on the variety sage blooms may vary from purplish pink to white.

Native to the northern Mediterranean coast, this sage is a standard herb in the herb gardener’s kitchen pantry.

Latin name:  Salvia officinalis

Common Variations of Garden Sage

The standard Garden Sage plant with grayish green leaves is the sage plant sold in most garden centres.

However, there are a number of variations of garden sage, that can add colour and size interest to your kitchen and landscape gardens.

Golden sage – dark green leaves with creamy yellow splotched edges

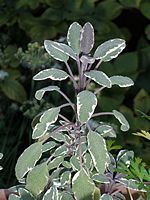
Tricolor Sage – colourful leaves that are stunning in any garden border – each sage leaf is blotched with white, purplish pink and green

Purple sage – purply green leaves with purple veins

Dwarf sage – dwarf variation of standard garden sage.  Great for borders and rock gardens

Mammoth sage – larger leaves than the standard sage variety

White dalmation sage – lighter and somewhat smaller leaves that are less bitter than the standard garden sage.  Not to be confused with White Sage (Salvia apiana)

All these variations of garden sage can be used in the same manner in the kitchen.

How To Grow Garden Sage

The Beautiful Tricolor Sage

Garden sage is an easy herb to grow.  And, because sage is a perennial, growing sage can reward you with an ample supply of sage leaves every year.

Garden sage grows best in full sun, and well-drained slightly alkaline soil.  Once it is established, garden sage plants do not need much moisture.

Sage is an attractive plant that can also be grown as an ornamental in any garden.  Garden sage also grows successfully in containers.

Starting  Garden Sage Plants

If you will be starting your sage plants from seed, plant them indoors in spring, then transplant them to the garden once all danger of frost is past.

Test the germination of your sage seed before using, as sage seeds do not store well.

Starting sage from seed , although not that difficult, requires patience as it may take two years to get a plant large enough to use.

Sage can also be started by taking divisions of an existing plant, taking cuttings from an existing plant and rooting them, or purchasing a nursery plant.

Maintaining Your Sage Plant

Prune your garden sage plants in the spring.  Also, clip off any branches that send up blooms.  This will help make your sage plant bushier, and producing more leaves for you.

Once the sage plant becomes too woody and leggy, you may want to replace your sage plant.

Depending on your growing conditions, you may need to replace your sage plants every 3 to 4 years, as the woody stems become scraggly or your sage plant succumbs to the winter elements.  However, many sage plants can grow for years.

Overwintering Garden Sage

Most garden sage varieties are hardy perennials ; hardy in zones 5 through 9.  Below zone 5, mulch your garden sage, and it too may survive the winter.

A hard winter may kill your sage plant.  Freezing and thawing spells can be detrimental to many perennials, including sage.

Purple sage and tricolor sage are less hardy than standard garden sage, and need to be protected with mulch over the winter.

Golden sage is the least hardy in colder climates – best grown in zone 7 or above.  If you live in a colder climate, grow golden sage as an annual.  You may also try wintering it indoors.

Growing Sage Indoors

Sage is more difficult to overwinter indoors than some other herbs.  But it’s worth trying.

I have had mixed results overwintering sage in my home.  Worst case though, I extend the availability of fresh sage for a couple of months, before the sage plant succumbs to winter’s low light levels and indoor growing conditions.

Not enough light is usually the case for the sage plants losing their leaves.  To increase your success of growing sage indoors, choose the sunniest window you have.  And, if it is feasible for you, grow your indoor sage plants under lights.

Harvesting And Storing Garden Sage

Sage leaves can be harvested whenever needed.  When harvesting larger quantities to preserve for the winter, make sure you leave enough of your sage plant intact so the plant stays strong enough to survive the winter.

Sage leaves dry easily, and hold their shape for winter storage or crafting.  Dry sage leaves as you would any other herb plant.  The leaves dry easily spread out on a cloth or paper towels.

Sage leaves tend to keep their structure well on the plants over the winter.  Sometimes in the winter, when I can reach the plant, I will pick off a couple of leaves to add to a roasting or stewing meat.

Cooking With Garden Sage

The dried sage herb has a much stronger and somewhat different taste than fresh sage.  With both fresh and dried, sage is a strong herb so a little goes a long way.

Both dried and fresh sage lend their unique flavouring to enhance meats, poultry, game birds, and sausages.

Sage also pairs nicely with egg, cheese and bean dishes.

Add sage to soups and stews.

Deep fry fresh sage leaves, and serve along with roasted meats.

Fry fresh chopped save leaves with butter, to flavor pasta or gnocchi.

Snip sage flowers, and add to salads or use as a garnish.

Brew some sage tea on a cold day.  I found that although it smells kind of musty, it is a very soothing drink in the winter.

To your herb gardening success,
Barb

Copyright © 2011 www.HerbGardenGal.com.  All rights reserved.
_________

Want to use this article in your Ezine or Website?  You can, as long as you include the complete article and the Copyright information.

Bringing Herbs Indoors

October 20th, 2011

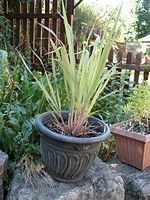
Herbs By The Garage Enjoying The Last Warm Days Of Fall

With frost looming any day, it’s always a last-minute mad dash to bring my herbs indoors to safety. I always reason – the longer the herb plants can enjoy the brighter light conditions, the better.

Yet, the first night the weather report calls for frost, all my precious herbs of the tender perennial variety need to be safely indoors.  It’s a ritual I repeat every year to save my herbs.

Why Bring Herbs Indoors?

If you live in a cold zone, bringing tender herbs indoors is the only way to keep them alive over the winter.

Perennial herbs originating in the Mediterranean, African, or southern Asian regions will not survive in the colder climates.

By over-wintering these tender herbs indoors, you can enjoy these fresh herbs through the winter.  And since you do not need to re-purchase these herb plants in the spring, you will be saving money.

Hardier herb plants grown in pots and brought indoors extend the availability of fresh herbs into the winter.  You will have your indoor culinary herbs available for use when you need them, and you won’t be paying winter supermarket prices.

Parsley is a good example.  Although I grow parsley in my garden, I also pop a couple of parsley herb plants into pots in the spring.  Then, I bring those potted parsley herbs indoors to enjoy fresh parsley throughout the winter.

How To Bring Herbs Indoors

The standard process of bringing herbs indoors is the reverse process to taking herbs outdoors in the spring.  Bring your herbs in for a little bit each day, longer each day, to acclimatize them to the lower light and humidity conditions indoors.

A few years ago, I read about a much less labour intensive method for acclimatizing herbs to decreased light levels.   A couple of weeks before moving your herbs indoors, move them to a shaded area, to get them accustomed to less light.

I haven’t tested this simplified method against the standard process for acclimatizing herbs to the indoors.  I suspect that herbs brought indoors via gradually bringing them in have a higher survival rate, but the less labour intensive method suits my schedule and works well enough for me to keep using it.

8 Tidbits of Advice for Overwintering Herbs Indoors

1.  If you have a lot of herbs that you will be bringing indoors, as the weather cools  move the potted herbs together close to where you can bring them in quickly.

This will be a big time and stress saver if you get caught by an unexpected cold spell.

I move my potted herb plants and any other plants I plan to overwinter next to the garage.  That way, if there is an unexpected frost warning, I can quickly move them to the garage to protect them.

Then the next day, it only takes a few minutes to move the herb plants back out if the weather is nice.  Or to move them permanently into the house.

2. Inspect and clean your herb plants before moving them indoors.

Most years I diligently clean my herb plants before bringing them indoors.  But, I have had years that I have moved my herb plants indoors and because of being busy, I did not clean them.

Without fail, I have found that the years that I take the time to clean my herb plants before bringing them indoors, I have less bug problems throughout the winter.

3.  Whether your herb plants have been acclimatized to the indoors or not, when the weather threatens bring your herbs indoors!

If you bring them in, your herbs have a better chance of surviving than if you leave them out in the cold.  And don’t be tempted to put your herb plants back out in the morning while there is still frost on the ground.

I used to leave for work early in the morning, and there was often frost on the ground even though the forecast called for a warm and sunny day.  And by the time I got home in the evening, the temperature dropped again.

If this is your scenario, then don’t stress about trying to get your herb plants out for a bit more warmth and sun.  Once they’re in, they’re in, and will likely be just fine.

4.  If you did not have a chance to clean your herbs before you brought them indoors, do it after the fact.

Even if you’ve been busy for a while, first chance you get make sure you clean those herb plants.

5. Check your herb plants regularly for bug problems.

If you see any bug problems, deal with them as soon as possible.  In an indoor confined area, with no natural pest control, the insect population can grow rapidly.

6.  If you need to stagger bringing your herbs indoors due to time or space constraints, start with your most valuable and most perishable herb plants first.

These would be the perennial herbs that grow only in zones 9 – 10 —many of which are also more expensive to purchase in the first place.

Then bring indoors the remaining perishable herbs.  Lastly, bring indoors more hardy herbs.

7.  Chives and garlic chives will benefit from being out in the cold weather for a while before being brought indoors.

Leave chives and garlic chives outdoors until the foliage dies back.  Once you bring your chive herb plant into your home, new shoots will sprout fairly quickly.

I’ve noticed that even if I bring chive plants indoors with their leaves intact, the foliage dies back shortly thereafter anyway.  And that the new growth on a chive plant that has spent some time outdoors in the cold is stronger.  Same goes for garlic chives.

8.  There is likely to be some herb plant loss each year.

The light and humidity requirements for many of these herb plants are higher than the plants will receive indoors.

To help minimize herb plant loss,

  • place your herbs in the sunniest windows, but not touching the window
  • if you have the space, you can purchase or set up a light system with grow lights to help your plants get more light.
  • water regularly – how often will depend on your herb plant and how dry the air is in your home.  Herb plants do not like wet feet though, and the roots can rot if overwatered.
  • check for insect infestations regularly, and deal with them promptly
  • when your herbs get spurts of weak spindly growth, trim this new growth by about half.  For culinary herbs, these herb cuttings are tender and are great used in salads or added to your cooking.

So, bring a few potted herb plants indoors, and enjoy their fragrance and flavours well into the winter.

To your herb gardening success,
Barb

Copyright © 2011 www.HerbGardenGal.com.  All rights reserved.
_________

Want to use this article in your Ezine or Website?  You can, as long as you include the complete article and the Copyright information.

Bay Laurel

September 23rd, 2011

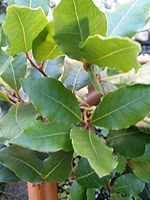
Bay Laurel

What Is Bay Laurel

Bay laurel, sometimes referred to as sweetbay or sweet bay laurel, is an evergreen tree native to the region encompassing the Mediterranean and Turkey.

It is the source of the staple cooking herb ‘bay leaves’.

Although dried bay leaves are the most readily available form of seasoning from this evergreen tree, fresh fragrant bay leaves are one of my favourite herbs.  They have a strong and complex aromatic scent that infuses almost any savory dish with its floral and spicy fragrance.

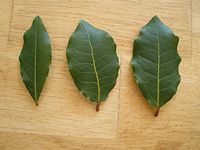
Fresh bay leaves are dark green, shiny and smooth with a brighter scent than their dried counterparts.

It is handy to grow your own bay tree for fresh leaves – just go outside and pick a couple of leaves for a recipe whenever you need it.

Latin name:  Laurus nobilis

How To Grow The Bay Laurel Tree

Planting and growing a bay tree is fairly easy, and you will be rewarded with fresh bay leaves year round.  And one bay tree is all you need for your kitchen herb garden.

Bay Laurel is a perennial tree, hardy in zones 8 through 10.  Bay trees grow in full sun to partial shade, and like well-drained soil.

Planted outdoors in warm climates, the bay tree can grow anywhere from 10 feet high to 40 feet high.  A potted bay laurel can grow up to about 5 feet.

Bay laurel flowers are not very noticeable – a creamy greenish yellow with no petals, forming purple fruits.  Living in a cold climate, I have never seen my bay tree flower or bear fruit.

The sweet bay leaf plant is an attractive ornamental tree that can be grown as a landscape tree in warm climates.

The bay laurel tree is also an ideal container plant, and can be grown indoors as a houseplant.

In colder climates, grow your bay tree in a large container that can be brought indoors for the winter, and back outdoors in the summer.  Bay trees overwinter indoors really well in a sunny window.

Occasionally, when you bring your bay laurel indoors, all the leaves will dry on it.  Usually, I have found this will happen if the bay leaf plant is exposed to too much cold before being brought indoors.

If your bay leaves start drying on the plant, pluck off the dry leaves and store them for use in your recipes.  Don’t throw out the tree though – new bay leaves will grow back on your tree.

Because it is an attractive tree, the bay leaf tree can also be incorporated with other planters for decorative patio gardens

Bay trees are easy to prune to suit your size needs.  They can be cut back without harm.  You can keep a bay tree small by clipping it regularly.  Use your clipped bay leaves for cooking, or dry them for future use.

Bay trees can be started from seeds or cuttings.

Starting a Bay Laurel from seed:  Seeds germinate at a temperature at about 75 degrees F within about 4 weeks.  However, they tend to be difficult to start from seed. Seeds tend to turn moldy easily.  Also, seeds that dry out in storage will not germinate.

Starting a Bay Laurel from cuttings:  Cuttings taken from young green shoots in the spring are the most likely to root.

The easiest way to start a bay tree is to purchase a young plant from a nursery.  Bay trees can grow for many years, so it’s definitely worth the investment in a tree.

Harvesting and Storing Sweet Bay Leaves

Bay Leaves

Harvesting Bay Leaves

Bay leaves can be harvested at any time throughout the year.

Pinch or snip off older leaves as you need them. When you prune your bay tree, dry the bay leaves from the branches you pruned off for use later.

Drying Bay Leaves

Bay leaves dry easily, and can be dried as they are harvested. Lay them out flat to dry on a surface with some air circulation.  The bay leaves will dry within a few days.  The colour of the bay leaves lightens as they dry.

If you want your bay leaves to stay flat during drying, place a board or some other type of light weight on the leaves, to keep them from curling as they dry.

Store dried bay leaves whole in a tightly sealed container once they’re dry.

Culinary Uses for Sweet Bay Leaves

Bay leaves are edible, and not poisonous.  Because they are a tough, leathery leaf, whole bay leaves should be removed before serving your dish, to avoid someone choking on it.  You can also grind up bay leaves for use in your recipes.

The leaves of the bay laurel are used in many cuisines around the world– bay leaves are prevalent throughout recipes from Europe, North America, the Middle East, and India (not to be confused with Indian bay leaf, which is related to cinnamon).

Bay leaves are a fundamental herb in French, Spanish and Creole soups, stews, marinades, and sauces.

Dried bay leaves are readily found in the spice section in supermarkets.  By using your own fresh or dried bay leaves, you can be sure that you are using bay leaves that have not been sitting on a store shelf for an extended period of time.

Bay leaves are a staple herb addition to soup and stew recipes.  Meat fish and poultry are complemented by the aroma and flavor of bay leaves.

And bay leaves are a must-have seasoning in crab and lobster boils.

Also add bay leaves to:

  • Tomato saucePickling brines
  • When cooking game meat
  • Cooking water when cooking beans, lentils, rice or other grains
  • Water when poaching fish
  • Tuck bay leaves into chicken cavity before roasting

It’s hard to go wrong by adding a bay leaf or two to most savory dishes.

So, grow a bay tree, and enjoy its beauty in your garden, and flavor in your cooking.

To your herb gardening success,
Barb

Copyright © 2011 www.HerbGardenGal.com.  All rights reserved.

_________

Want to use this article in your Ezine or Website?  You can, as long as you include the complete article and the Copyright information.

Thyme Herb in the Kitchen Herb Garden

September 8th, 2011

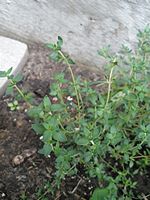
English Thyme

What Is Thyme

Thyme is a very aromatic herb of Mediterranean origin.  And today, thyme is a staple herb in any kitchen herb garden.

Dried thyme is readily available in the herb section of supermarkets. And thyme plants are easy to find at the garden center.

Thyme is a perennial evergreen shrub that grows low to the ground.  Due to its compact growth, thyme varieties are commonly used as a ground cover or border plant.  Thymes are also commonly planted in windowsill herb gardens.

Latin:  Thymus

Thyme Blossoms

The tiny flowers of the thyme herb bloom in June and July.  Bees love these tiny thyme blossoms, that range in colour fom pink to a soft purple.  There are also varieties that bloom with white flowers and darker hues of red/pink.

Thyme Varieties

A wide range of thyme varieties exist.  The most common thymes have the traditional scent and flavor that we tend to associate with thyme.

Thymes with citrus undertones are also common, with distinct citrus undertones of lemon, lime, and orange.    As well as thymes with undertones of spices, such as caraway thyme and nutmeg thyme.

Thyme Favourites

English thyme – most popular variety, and what we associate with the traditional flavor and aroma of thyme

French thyme –  flavor is a little sweeter than English thyme, and slightly different in a way that’s hard to describe.  Not as hardy as English thyme

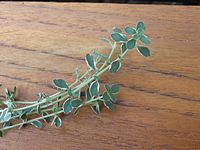
Silver thyme – same flavor and aroma as English thyme.  Attractive variegated foliage of green leaves edged with white.

Lemon Thyme – has a distinct aroma and taste of lemon.  Looks and grows very much like the standard English thyme.

Wild thyme / Mother-of-thyme – creeping thyme that forms a dense mat, and tolerates being walked on, perfuming the air with each step.

Woolly thyme – grayish woolly leaves form a dense low carpet as it grows.  Not used in cooking due to its lack of scent and flavor.

How To Grow Thyme

Lime Thyme Growing In A Container

Due to is compact growth and versatility in the kitchen, thyme is a first choice pick for windowsill and container herb gardens.

Thymes are also commonly planted as ground covers, or border plants along walkways.

Thymes are easy to care for plants.  They do not require any special attention once they are planted.

Thyme likes full sun, and can tolerate partial shade.  Thymes need good drainage to grow healthy, so plant your thyme in well-drained soil – this is one plant that is perfectly happy in sandy soil.

Because thyme plants are commonly found in garden centres in the spring, it is easy to find thyme plants to start from nursery seedlings.

Thyme plants can also be started from seed, or by propagating from existing plants in your or a friend’s garden.

Propagating Thyme.  Thyme can be propagated by taking stem cuttings, dividing a mature plant, or by layering.  Best time to propagate a thyme plant is in the spring.

Starting Thyme from Seed:  Plant thyme seeds indoors about a month before your last frost date.  Thyme seeds require about 70 degrees F / 21 degrees C temperature to germinate.

Overwintering Thyme:  Although thymes are hardy down to zones 4 and 5, I have found over-wintering thymes is not always reliable.  Low growing ground-cover thymes overwinter in the northern zones better than the bushier thymes.

To overwinter thyme in your garden, cover the thyme plants with mulch to protect them from winter’s deep freezes.

In milder climates, you should have no problem overwintering thyme.  Mulch for winter protection, if In doubt.

Harvesting and Storage

Thyme sprigs can be harvested for use at any time.

To harvest a larger amount of thyme cut the thyme herb plant back, but no further down than two inches above the base of the plant.  Harvest the thyme this way early to mid-season to give your thyme plant enough time to recover.  Bulk harvesting your thyme plant too close to winter will jeopardize winter hardiness.

Drying Thyme.  Thyme is easy to dry.  Tie the thyme stems together and hang to dry easily.  Or strip the leaves of the thyme stems and dry on a fine mesh screen.

Freezing Thyme.  Thyme also freezes well for winter use.  Wrap a few thyme sprigs in plastic wrap, and then freeze these individual packets in freezer bags.  Alternately, strip the thyme leaves from the stems, and freeze in ice cube trays.

Cooking With Thyme

Thyme is a versatile herb that goes very well with most foods – meat, fish, vegetables, eggs, cheese are all great seasoned with thyme herbs.  Thyme is a staple seasoning in many soups and stews.

7 Tips for using thyme in cooking:

Silver Thyme Sprigs

  • Bouquet garni – traditional soup and stew seasoning.  Tie together sprigs of thyme, parsley, and bay leaf.  Toss this packet into the pot when making stews or soup stocks.
  • Lemon thyme and citrus thymes in general, are best used fresh as the citrus gets lost in the drying process.
  • Drop thyme or lemon thyme into boiling soup last-minute, for a beautiful aromatic touch to the soup.
  • Lemon thyme pairs nicely with chicken.  Use it when seasoning your chicken for roasting.  Or, I like to add a bit of lemon thyme to a simple bread stuffing, before stuffing the chicken for roasting.
  • Caraway thyme is an awesome seasoning for beef.
  • The tiny delicate thyme blossoms are edible, and can be added to salads or used as a garnish.

To your herb gardening success,
Barb

Copyright © 2011 www.HerbGardenGal.com.  All rights reserved.
_________

Want to use this article in your Ezine or Website?  You can, as long as you include the complete article and the Copyright information.

Lovage Herb

August 24th, 2011

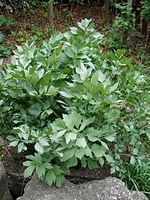
Lovage Herb In The Spring

What Is Lovage

Lovage is a leafy perennial herb that has a celery-like scent and flavor.

Sometimes the flavor and aroma of the lovage herb are said to resemble the liquid seasoning Maggi sauce.

Easy to grow, lovage can last for years once it’s planted.

The entire lovage plant is edible, with the tender leaves and hollow stems being the most commonly used parts of the plant.

The small yellow flowers of lovage are arranged in umbels, and attract a host of beneficial insects to the garden.

Lovage is a real treat in the springtime.  Bright green new growth of the lovage plant returns early in spring, being one of the first plants to sprout in the spring garden.

Lovage is not commonly found in the spice rack and fresh herb sections at the grocery store.  So, to enjoy this versatile herb in your kitchen, plant your own lovage in a corner of your garden.

Latin name:  Levisticum officinale

How To Grow Lovage

Planting and growing lovage is the best way to ensure you have supply of this herb on hand for your recipes.

The lovage herb is an easy to grown herb.  Lovage requires little care to thrive and grow into tall productive plant quickly.

Add one lovage plant to the back of any kitchen garden or perennial border, for a steady supply of celery-flavoured leaves.

Because lovage is a tall and vigorous plant, often growing to a height of 5 – 6 feet (2 meters), plant it at the back of the garden.

Usually one lovage plant is enough for a home garden.

Because one lovage plant is usally enough, it is easiest to start growing lovage from a nursery seedling, or a division from a fellow gardener’s mature plant.

Lovage can also be started from seed.  To grow lovage from seed, sow the seed in late summer to early fall in your garden.

Lovage grows in full sun to partial shade.  It is hardy from plant hardiness zone 5 through to 8.  You may be able to find lovage returning in spring down to zone 3, if grown in a protected area.

The lovage plant dies back to the ground every winter, only to return bright and strong each spring.

And, lovage herb plants tend to be long-lived.  I’ve had my current lovage plant growing strong for over 10 years now.

To Bloom Or Not To Bloom

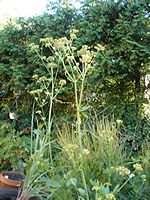
Lovage Herb Flowering Stems

Whether to snip off the flower stalks as they appear, or leave them to go to bloom is a matter of choice.

If you want to encourage bushy growth, cut off the flower stalks as they appear, and harvest your lovage frequently.

Lovage flowers attract a host of beneficial insects.  So, if you garden organically and/or are looking to attract beneficial to your garden, let your lovage plant bloom.   The umbels of yellow flowers also add interest to the back of a perennial garden.

Cut off the seed heads before they ripen to keep volunteer lovage plants at bay.

Propagating Lovage By Root Division

Lovage is easy to propagate by root division.

In the spring just as the leaves start to emerge, cut divisions from the outer edges of an established lovage plant.  Ensure that each root piece has a leaf shoot attached.

Plant the newly divided shoot promptly in its new location, or offer up a lovage shoot to a gardening friend.

Harvesting and Storing Lovage

Harvest lovage leaves whenever you need them.

Lovage leaves and stems can also be harvested as they grow throughout the season, to store for winter use.

Harvest seeds when they are ripe.  Lovage seeds are ripe when the tiny fruits encasing the seeds start popping open.

Drying Lovage.

Lovage leaves and stems can be dried easily.

Use the smaller stems, as the stems tend to become tough as they grow larger.

Store dried lovage in an opaque container or in a dark area, away from any sunlight.  Light tends to cause dried lovage to lose its green colour quite readily.

For instructions on how to dry lovage, or any other leafy herb, see my post

How To Dry Herbs – Drying Italian Herbs

Freezing Lovage.

Lovage leaves and stems can also be frozen, to be added to soups and stews.

Freeze entire stems and leaves to toss into a soup stock.  Or chop up the leaves and/or stems, and freeze in ice cube trays to add to any cooked dish as needed.

Some sources suggest to blanch lovage leaves before freezing.  I’ve never done that, and the frozen lovage herb has been perfectly fine used in my cooked dishes.

Lovage Seed.

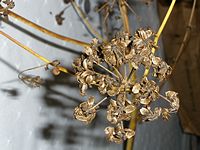
Lovage herb seeds are dark brown, and oblong shaped.  Once harvested from your lovage plant, store the seeds in a dry container with your other spices.

Ripe Seedhead of Lovage Herb

Using Lovage

Use dried and frozen lovage in any cooked dishes where you want to add a celery-like flavor.  Lovage is especially good used in soups, sauces, casseroles, and stews.

Use the fresh lovage herb leaves as you would dried or frozen lovage.  Fresh lovage leaves are also great added to salads, or used as a garnish.

If you are looking for a savory easy-to-care-for herb to add to your herb garden, then give the lovage herb a try.

To your herb gardening success,
Barb

Copyright © 2011 www.HerbGardenGal.com.  All rights reserved.
_________

Want to use this article in your Ezine or Website?  You can, as long as you include the complete article and the Copyright information.

Scented Geraniums – Pelargonium Geranium

August 4th, 2011

attar of roses scented geranium leaf

What Are Scented Geraniums

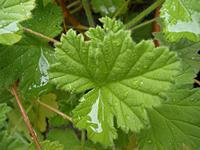
Scented geraniums are charming plants with the most curiously fragrant foliage.

The leaves of these pelargoniums are naturally infused with scents ranging from fruity to spicy, citrus, rose, cinnamon, nutmeg, apple, almond, minty, even with a hint of chocolate.

Native to South Africa, Scented Geraniums were introduced to England in the 17th century.  Scented geraniums were commonly planted in windowsill gardens in Victorian England.  These gloriously scented plants also enjoyed popularity in France, especially the rose scented geraniums which were used in the perfume industry.

Some scented geranium plants also have vibrantly colourful flowers, enhancing their appeal in a mixed container planting.

Botanical name:  Pelargonium

How To Grow Scented Geraniums

Scented geraniums grow extremely well in windowsill gardens, or as potted plants.  They are also a superb container herb plant for apartment balcony gardens.

Overall, their shape and fragrance makes scented geraniums lovely house and garden plants.

Grow your scented geraniums close by, where you can brush up against them to release the scent from the fragrant pelargonium leaves.

Scented geraniums like full sun and well drained loamy soil.  They tolerate dry conditions.

Scented geraniums are tender perennials – hardy in zones 10 and 11.

Occasionally prune the scented pelargonium plant to keep a nice shape, and to keep the plant from becoming leggy.

Propogating Scented Geraniums

Starting Scented Geraniums from cuttings is the preferred way to propagate these fragrant leafed plants.

If starting your scented geraniums from seed, plant the seeds indoors 12 weeks before you plan to set them outside.

Take plants outside only after all danger of frost is past.

Overwinter Scented Geraniums Indoors

Scented geraniums do not tolerate frost whatsoever, so bring them indoors before any danger of frost.

Although some people grow them as annuals, scented geraniums overwinter well indoors near a sunny window.

I keep mine in planters year round, taking the pots out in the late spring, and bringing them back indoors in September.

Prune back the leggy winter growth by about half.

And, remember to brush by the fragrant leaves occasionally.  You will be rewarded with a whiff of glorious summer scents in the middle of winter.

Scented Geranium Uses

fingerbowl lemon scented geranium

Culinary

The fragrant scented geranium leaves are used to flavour preserves, baked goods, and herbal teas.

Not all the scented geraniums leaves taste edible.  So, if you want to use your plant for culinary purposes, check the variety before you buy.

Fingerbowl lemon scented geranium has pretty petite leaves with a bright lemon scent.  For a touch of Victorian elegance, place a few small leaves in fingerbowls to be used after a meal with messy finger foods.  You and your guests will feel special.

Cosmetic

Scented geraniums are also used in perfumes, potpourris and ointments.  Rose scented geraniums are especially lovely in potpourris as they retain their rose scent well when dried.

Mosquito Repellant

Over the past few years, a citrusy, citronella scented variety has been sold as a mosquito repelling plant.  For maximum effectiveness, agitate the leaves of the plant to release its citrusy scent into the air around you.

Want an herb plant that’s a little different?  Pick a scent, choose your scented geranium, and enjoy!

To your herb garden success,
Barb

Copyright © 2011 www.HerbGardenGal.com.  All rights reserved.
_________

Want to use this article in your Ezine or Website?  You can, as long as you include the complete article and the Copyright information.

Marinated Goat Cheese Recipe with Thyme Herb and Garlic

July 25th, 2011

Goat Cheese Marinade Ingredients - Thyme, Goat Cheese, Olives, Garlic

Fresh thyme in the herb garden is so abundant in July.

And simple recipes that feature fresh herbs and don’t require turning on the stove are a real treasure.

This lovely and simple thyme and goat cheese recipe is just that.  Both elegant enough to serve at a dinner party, and casual enough to enjoy as an afternoon snack, there is no cooking involved.

And the recipe takes full advantage of the abundance of the wonderfully fragrant herb thyme.

I first had this marinated goat cheese and thyme spread when one of my fellow taiko drummers brought the thyme infused goat cheese to a rehearsal.  I was blown away by how addictively good the flavours were — I couldn’t stop eating it.

So, of course I asked for the recipe.   When she sent me the recipe, I was even more blown away by how simple this dish is to make.

Hope you enjoy it as much as I do.

Marinated Goat Cheese Recipe

8 oz. goat cheese
6 tablespoons olive oil
3 tablespoons balsamic vinegar
½ cup kalamata olives, chopped
2 cloves garlic, minced
1 tablespoon fresh thyme, chopped
1 teaspoon black pepper
Fresh thyme sprigs for garnish

1.  Place the goat cheese in a shallow container.

2.  Mix together olive oil, balsamic vinegar, chopped olives, garlic, thyme and pepper.

3.  Pour this mixture over the goat cheese, keeping as many of the olives on top of the cheese as you can.

4.  Allow the goat cheese to sit in the refrigerator for 6 hours, or 2 hours at room temperature, to marinade.  Occasionally spoon the marinade over the goat cheese.

5.  Just before serving, place the fresh thyme sprigs on top of the marinated goat cheese for garnish.

6.  Serve with a sliced baguette, crackers, or any good French or Italian style bread.

Tips:

1.  8 oz. equals approx. 227 grams.  You can use 2 pieces of 1” thick rounds of French chevre, 2 small logs of goat cheese, or 1 large log of goat cheese (200 gram – 300 gram size).

2.  Because this dish is not cooked, the flavours of the fresh ingredients are paramount.  Make sure you use a good quality olive oil and a good quality balsamic vinegar.

3.  You can make this recipe the night before.  The complex flavours of this dish really develop nicely as the goat cheese sits in this thyme and garlic infused dressing.

4.  In a pinch, you can make the recipe without the marinating time.  I have made this spread last-minute on more than one occasion.  The end product was not as complex – more garlicky and less thyme flavor throughout, but still very good.

5.  If you’re making this dish for a party, make an extra one for yourself for the following day.

Then, In the middle of the sweltering afternoon heat, pour yourself a glass of wine, or chilled sparkling water, pull out the thyme and goat cheese spread with some fresh bread.  Relax, and enjoy the afternoon.

To your herb garden success,
Herb Garden Gal

Copyright © 2011 www.HerbGardenGal.com.  All rights reserved.
_________

Want to use this article in your Ezine or Website?  You can, as long as you include the complete article and the Copyright information.